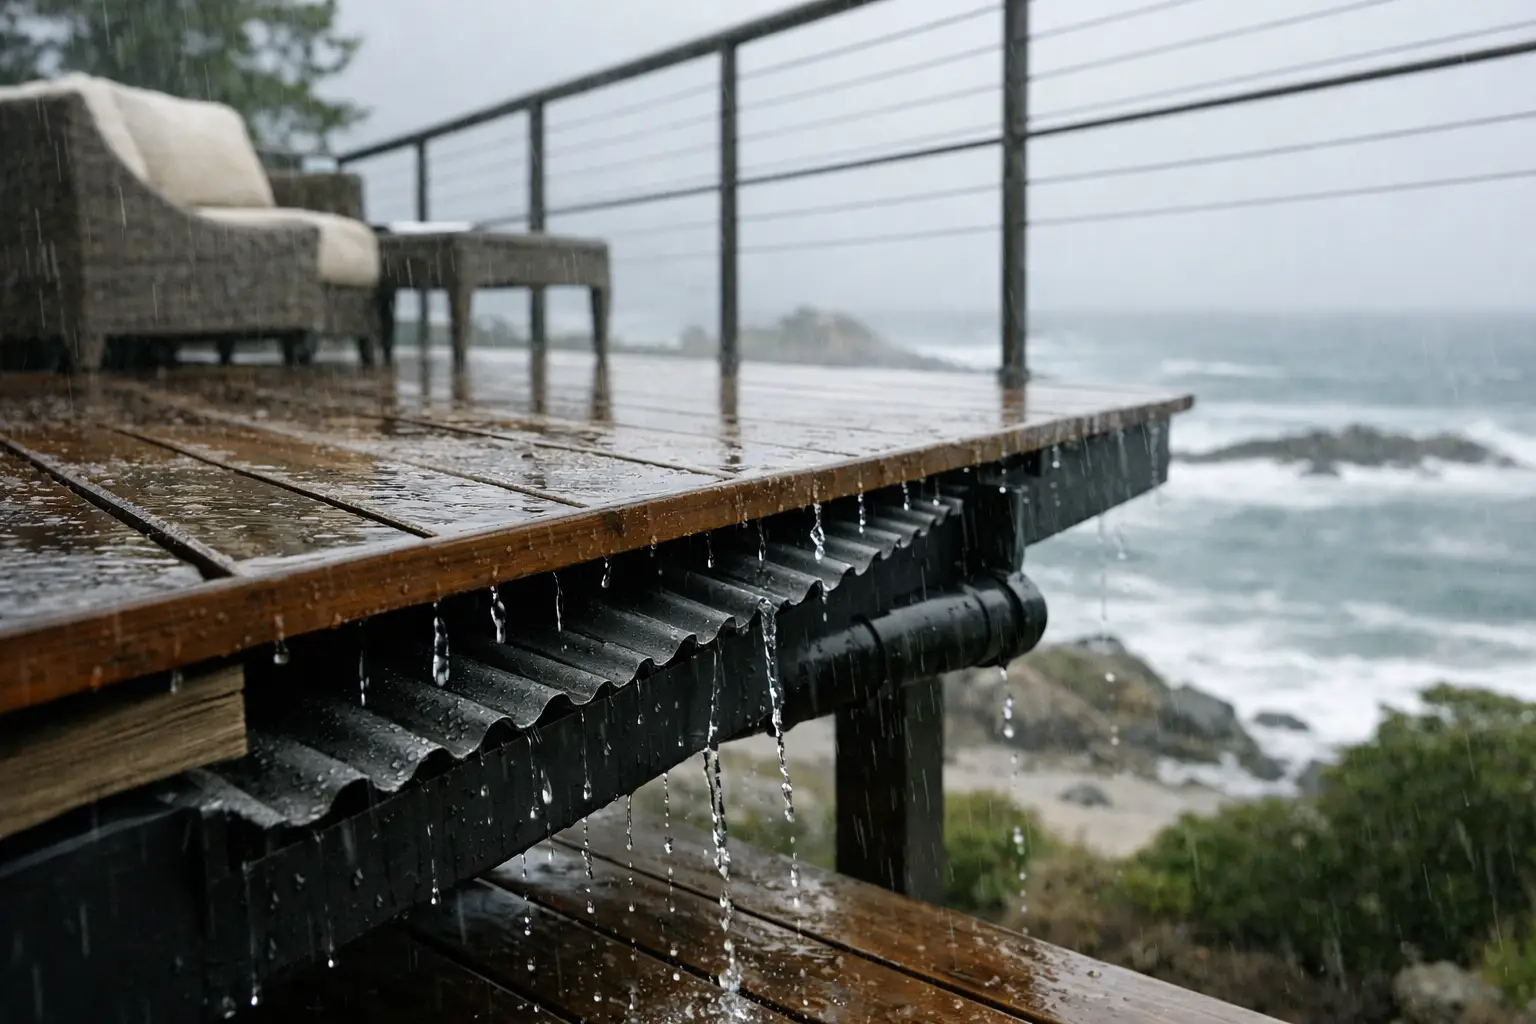
A deck can look perfectly finished on a dry afternoon and still have a drainage problem waiting for the first long stretch of rain. On Vancouver Island, water management is not an optional finishing detail. It affects the deck frame, the house connection, the usability of the area below, and how long the entire structure will last. Knowing how to plan deck drainage before construction begins helps prevent trapped moisture, staining, rot, and costly repairs later.
The right approach depends on whether the deck is elevated, attached to the home, covered, or intended to create usable space underneath. Good drainage is rarely one product or one slope. It is a coordinated plan for moving water off the deck surface, away from structural wood, and safely into a controlled runoff area.
Start With Where the Water Will Go
Drainage planning should begin at ground level, not at the deck boards. Before choosing an under-deck system or laying out joists, identify where rainwater can discharge without creating another problem.
Look at the grade around the house, nearby walkways, garden beds, retaining walls, and the foundation. Water should never be directed toward the home or allowed to pool beside footings. A deck that drains freely but empties onto a lower patio, stair landing, or neighbour-facing property line still needs a better runoff plan.
For many homes, the best solution is to route water toward a properly graded landscape area, existing stormwater management system, or suitable drainage route approved for the property. Local requirements can vary, particularly where runoff connections and lot grading are involved. A contractor should confirm the practical path for water before the deck design is finalized.
Plan Deck Drainage Around the Deck Type
The deck’s height and intended use determine how much drainage control is needed. A low deck close to grade may only need proper board spacing, good ground drainage, and durable framing details. An elevated deck over a patio or entry area often needs a dedicated under-deck drainage system to keep the space below dry.
Open Decks Need Airflow and Clear Gaps
Most conventional decks are designed as open surfaces. Rain passes through the spaces between boards and lands on the ground below. This can work well when the area beneath the deck is open, graded correctly, and not intended for storage or outdoor living.
Board spacing matters. Gaps that are too narrow can hold debris and slow drainage, especially after leaves, needles, and coastal dirt build up. Gaps that are too wide can affect appearance and comfort underfoot. The correct spacing depends on the decking material, its expected movement, and the manufacturer’s installation requirements.
The framing below also needs room to dry. Joists, beams, and hardware should be selected and installed with moisture exposure in mind. Pressure-treated lumber, corrosion-resistant fasteners, and proper flashing at the house are all part of a drainage-minded deck build.
Elevated Decks May Need an Under-Deck System
If you want a dry patio, seating area, storage zone, or walkway beneath an elevated deck, water must be captured before it reaches the space below. Under-deck drainage systems usually install beneath the deck boards and above the joists or within the framing layout, depending on the product and design.
A properly planned system uses sloped troughs or panels to collect water and direct it into a gutter or drainage channel. From there, downspouts carry it to a safe discharge point. This creates a dry-use area below while protecting the framing from water that would otherwise sit on horizontal surfaces.
There is a trade-off to consider. Retrofitting drainage beneath an existing deck may be possible, but it can be more difficult to inspect or repair framing later. Integrating the drainage system during new construction generally gives cleaner details, better flashing coordination, and a more polished result.
Give Water a Deliberate Slope
Water does not need much encouragement, but it does need a clear direction. Drainage troughs, gutters, and finished surfaces should all be installed with enough slope to avoid standing water.
The deck boards themselves are generally installed level for comfort and appearance, with drainage occurring through the board gaps. An under-deck system, however, requires a planned slope toward its collection gutter. The exact slope should follow the system manufacturer’s requirements, but the goal is consistent: water should travel, not linger.
Pay close attention to transitions near the house. Water can collect where the deck meets siding, flashing, ledger connections, or a covered roof edge. These are high-risk areas because moisture trapped against the building can cause damage that remains hidden until repairs become significant.
Protect the House Connection First
The ledger board is one of the most critical parts of an attached deck. It carries structural load, but it also creates a penetration point at the home’s exterior. If water gets behind the ledger, it can damage sheathing, framing, insulation, and siding.
Proper flashing is essential. It should direct water away from the wall assembly rather than allowing it to run behind the deck connection. The flashing detail must work with the home’s existing siding and weather-resistive barrier, not simply sit on top of them.
This is one area where cutting corners is particularly risky. Surface caulking alone is not a reliable drainage strategy. A well-built deck uses layered protection: correctly integrated flashing, appropriate fasteners, careful siding details, and a drainage path that does not force water toward the home.
Account for Gutters, Roof Runoff, and Covered Areas
A deck often sits below a roof edge, upper balcony, or eavestrough. If roof runoff is not considered, a new deck can end up receiving concentrated water from above during heavy rain.
Confirm where downspouts discharge before construction begins. A downspout that currently empties onto a future deck surface may need to be extended, rerouted, or connected to a suitable drainage path. Likewise, a covered deck roof needs gutters and downspouts sized and positioned to keep water from pouring over entrances, stairs, or deck edges.
Do not overlook splashback. Water hitting a hard patio, decorative stone, or poorly graded soil below the deck can spray moisture back onto the framing and lower siding. Directing runoff farther from the structure protects both the deck and the house exterior.
Choose Materials That Handle Persistent Moisture
Drainage planning is more effective when paired with materials suited to wet conditions. Decking, framing, fasteners, connectors, flashing, and gutter components all need to withstand regular exposure to rain and humidity.
Composite decking can reduce surface maintenance and moisture-related deterioration, but it still requires proper spacing and support. Wood decking offers a traditional look, though it needs consistent maintenance to limit water absorption, checking, and decay. Neither material solves a drainage issue on its own.
Below the surface, use hardware rated for treated lumber and coastal conditions. In exposed locations, corrosion resistance matters. A failed fastener or connector can become a structural concern long before the deck boards show visible wear.
Design Stairs and Edges to Shed Water
Stairs are easy to overlook in a drainage plan. Water can collect on treads, run behind fascia, or discharge at the bottom landing where it creates mud, ice risk in colder snaps, or erosion. Make sure the landing area has stable drainage and that stair details do not trap debris.
Deck edges also need attention. Fascia boards, rim joists, and gutter terminations should be finished so that water does not wick into exposed end grain or sit behind trim. Clean edge details improve appearance, but they also make maintenance easier because leaves and debris have fewer places to collect.
Build Maintenance Into the Plan
Even the best drainage layout needs occasional care. Gutters fill with leaves, board gaps collect debris, and downspout outlets can shift after landscaping work. A drainage system that cannot be accessed or cleaned easily will not perform as intended over time.
Plan for clear access to gutters, downspout connections, and under-deck channels. Check the deck after the first heavy rain. Look for dripping at joints, standing water, splashback near the foundation, and areas where runoff is cutting into soil. Addressing a small issue early is far easier than repairing water-damaged framing.
A deck should add usable outdoor space without adding another water-management worry. When slope, flashing, runoff routes, materials, and finishing details work together, the result is a cleaner-looking structure built to handle the weather it will actually face. For a new deck or a drainage upgrade, careful planning at the start is what keeps the finished space dependable through the wet seasons.
Leave a Reply