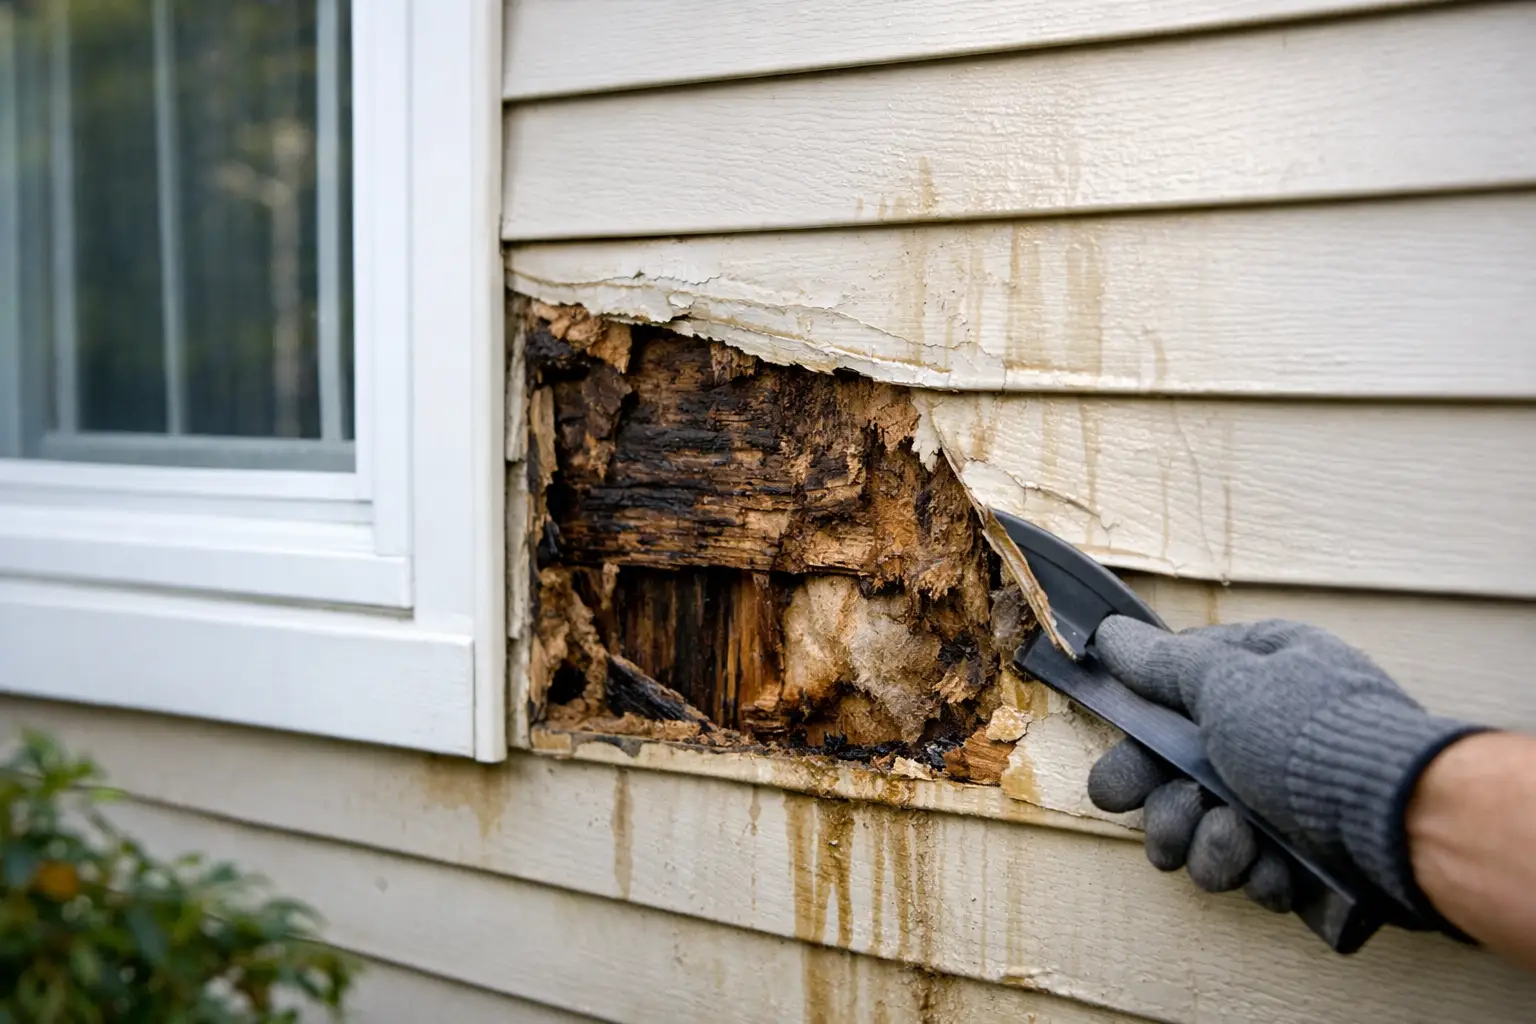
A siding water damage example often starts with something that looks minor: a few swollen boards near a window, peeling paint at the bottom of a wall, or a dark stain that remains after several dry days. On Vancouver Island, where extended rain and coastal moisture are part of the climate, those surface changes can point to water moving behind the siding. The visible mark is rarely the whole problem.
A siding water damage example from a typical exterior wall
Consider a homeowner who notices a narrow vertical stain below a second-storey window. The siding is still mostly straight, but several boards feel soft near the lower edge. Inside, there is no obvious leak, no stained drywall, and no damp smell. It would be easy to assume that repainting and replacing a few damaged boards will solve it.
Once the affected siding is removed, however, the cause becomes clearer. The window trim has a small gap at one upper corner, and the flashing behind the trim was either missing or incorrectly lapped. Rainwater has been entering at that point, travelling down the wall cavity, and wetting the sheathing behind the siding. Over time, repeated wetting has softened the wood sheathing and damaged the building paper.
This is a common pattern because water does not always appear directly below the point where it enters. It follows gravity, seams, fastener holes, framing, and changes in material. By the time damage becomes visible at the exterior surface, moisture may have affected a larger area around the window, below it, or near the wall-to-roof connection.
What the visible signs can tell you
In this example, the staining and soft siding are symptoms rather than the source. Several exterior warning signs deserve a closer look: siding that is warped or buckling, swollen edges, cracking caulk, loose trim, paint that peels unusually quickly, and dark discolouration around openings. Vinyl siding may not rot, but moisture behind it can still damage the sheathing, framing, insulation, and trim.
Wood and engineered wood siding can show water damage more directly. Boards may become soft when pressed, separate at joints, split along edges, or develop a cupped profile. Fibre cement is highly durable, but its cut edges, joints, penetrations, and flashing details still need to be properly finished. Water management depends on the full wall assembly, not the siding material alone.
Why a window detail matters so much
Windows, doors, vents, light fixtures, hose bibs, and electrical boxes interrupt the siding system. Each one needs properly integrated flashing and weather-resistant layers that direct water back to the exterior. Caulking helps seal specific joints, but it is not a substitute for flashing or a drainage plane.
A correct installation is designed with overlapping layers. Water that gets behind the cladding should be able to drain outward rather than becoming trapped against the sheathing. This detail is particularly valuable in a wet coastal climate, where walls may face frequent rain before they have fully dried from the last storm.
The damage may extend beyond the soft spot
Opening a wall in the siding water damage example above may reveal only a small area of deterioration. It may also reveal wet insulation, decayed sheathing, corroded fasteners, or framing that needs repair. The extent depends on how long the leak has been active, the wall design, exposure to wind-driven rain, and whether the assembly has a drainage gap.
That uncertainty is why a proper assessment matters. Replacing visibly damaged boards without correcting the entry point can conceal the issue for a season or two, while moisture continues to work behind the new finish. A repair should address the failed detail, restore sound backing materials, and rebuild the siding system so it sheds water as intended.
How water gets behind siding
Not every siding issue comes from a dramatic storm. Many cases develop slowly through small installation gaps or aging exterior details. Roof-to-wall flashing, chimney intersections, deck ledger boards, window trim, and penetrations are all common locations where water control needs careful workmanship.
Overflowing gutters can also create concentrated water exposure. If gutters are blocked, incorrectly sloped, or too small for the roof area, water may spill onto fascia boards and wall surfaces. Splashback from poorly managed downspouts can repeatedly soak the bottom courses of siding. Ground clearance matters as well. Siding installed too close to soil, mulch, or a deck surface is more likely to stay wet and deteriorate prematurely.
Wind changes the equation. Rain driven sideways can reach joints and openings that would remain dry in calm weather. Homes in exposed areas of Vancouver Island need exterior details that account for this type of weather, especially on the sides of the home that receive the strongest prevailing winds.
What to do when you spot possible water damage
Start with observation, not assumptions. Take photos after rain and again after a dry period. Note whether staining grows, whether siding feels soft, and whether the issue appears around a window, roofline, deck, or exterior fixture. Check gutters and downspouts for blockages or discharge that lands too close to the foundation.
Avoid simply applying more caulking over every crack. Caulking has a role, but excessive or misplaced sealant can trap water and make future inspection harder. It can also hide an underlying flashing issue without resolving it.
If siding is soft, loose, visibly warped, or showing recurring staining, arrange a professional exterior assessment. The contractor should examine the surrounding wall details, identify the likely water path, and explain what needs to be opened for confirmation. A clear scope should distinguish between cosmetic siding replacement and repairs to sheathing, flashing, or framing.
For active leaks, prompt action is worthwhile. Drying and repairing a limited section of wall is generally less disruptive than waiting until moisture has affected a wider area. If you see interior staining, mould-like odours, or a sudden change after a major storm, treat it as more urgent.
Repair or replacement: choosing the right scope
A localized repair can be the right answer when damage is limited, the surrounding siding remains sound, and the source of water can be corrected with a properly detailed repair. This may involve removing a section of siding, replacing damaged sheathing, installing appropriate flashing, and matching the repaired area to the existing exterior as closely as possible.
Full replacement becomes more practical when water damage appears in several areas, the siding is near the end of its service life, or the existing installation has widespread detailing concerns. It may also make sense when homeowners want to improve insulation, drainage performance, or the overall appearance of an aging exterior. The larger initial investment can prevent repeated spot repairs and provide an opportunity to rebuild the wall assembly correctly.
There is no one-size-fits-all answer. Material availability, the age of the current siding, the location of the damage, and the condition of the wall behind it all affect the best path forward. Quality workmanship matters most at transitions and edges, where a durable siding product can still fail if the water-management details are overlooked.
Preventing the next water problem
A few routine checks can help protect an exterior between major projects. Keep gutters clear, ensure downspouts send water away from the home, trim vegetation that holds moisture against walls, and inspect caulking and trim around windows each year. Look closely after periods of heavy rain, particularly at wall sections below roof intersections and around exterior additions.
When it is time for siding work, choose an installation approach built for local conditions rather than a surface-only upgrade. DryTek focuses on the details behind the finished siding, including proper flashing, clean transitions, durable materials, and precise finishing that protects the home as well as its curb appeal.
A small stain can be the first useful warning your exterior gives you. Addressing it with a careful inspection and a properly built repair helps keep a manageable siding concern from becoming a much larger wall problem.
Leave a Reply